Create a custom workflow to create a simple Load Balancing configuration
You will learn how to create a custom Workflow to complete the following: - Create a Pool - Add members to the new Pool - Create a VIP - Enable SNAT the VIP
Process Tip
During the following workflow you may save and exit at some point . The Create Workflow in this exercise assumes you stay in the Edit mode for the entire process. In the event that you exit the edit mode it is a simple task to get back to it - Select the Workflow you wish to edit - Select the schema tab - Select the pencil icon - Expand the tabs as needed to return to your work
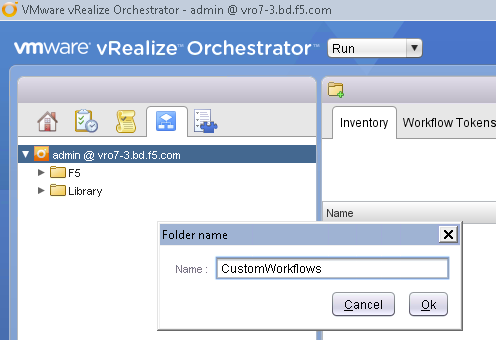
Create a CustomWorkflows Folder
Note: This step has been completed. Sample workflows are in the folder
Right click on the admin@vro.f5demo.com container. - Choose Add Folder. - Enter CustomWorkflows in the Name field - click Ok.
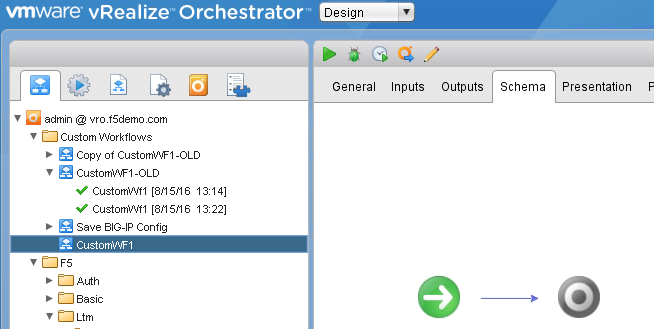
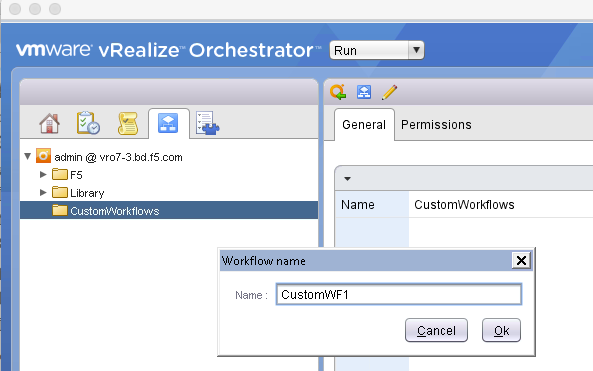
Create a Custom Workflow
Right click on the CustomWorkflows folder - Choose New Workflow - Enter CustomWF1 - Choose OK - Select Save
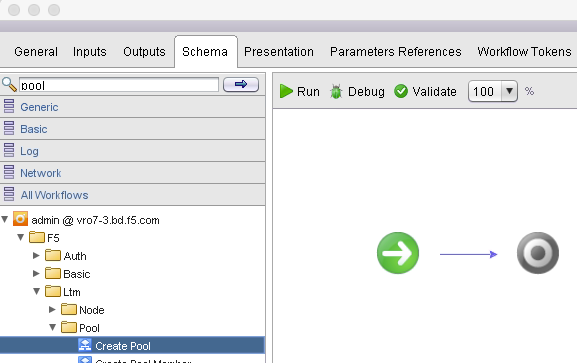
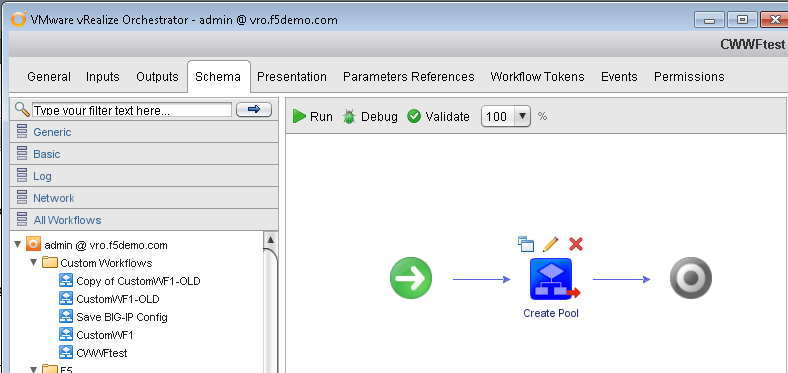
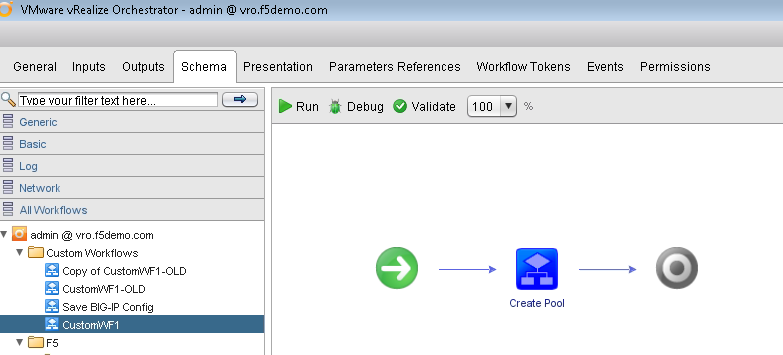
Create Pool and add it to Custom Workflow
Select the Schema Tab Expand the All Workflows heading on the left and navigate to F5/Ltm/Pool
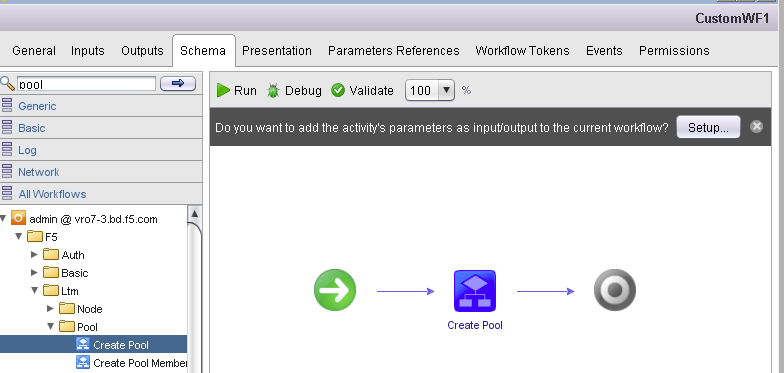
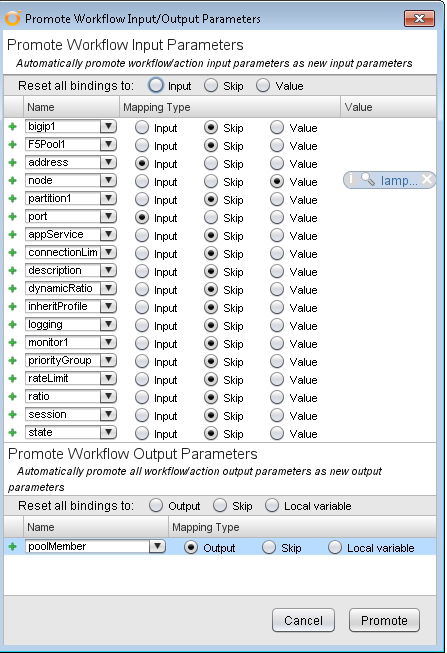
Choose the Setup button in the upper right(This will bring up the Promote Workflow Input Parameters)
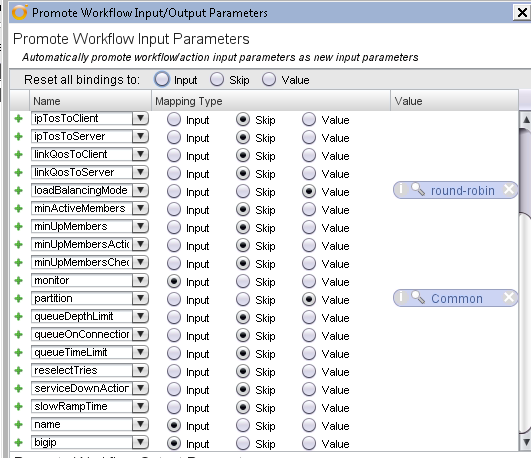
Choose Skip in the Reset all binding to: section
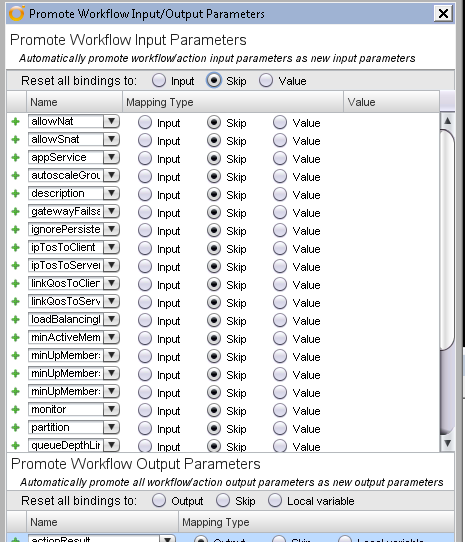
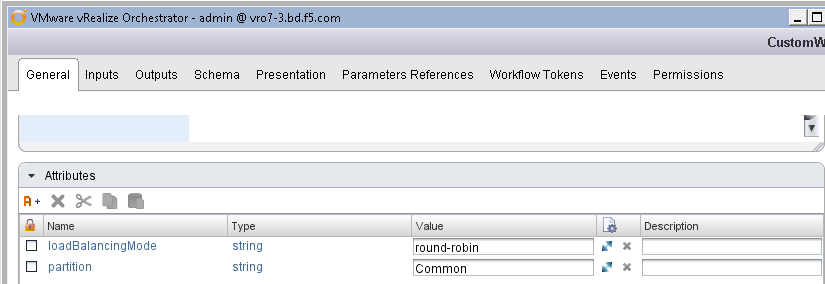
Choose Value for loadBalancingMode and enter round-robin (This will be the default load balancing algorithm used) Choose Value for partition and enter Common (This will force all objects created by CustomWF1 to be put in the Common partition)
Select Input for monitor, name and bigip (scroll down for the last 2) :
Choose Promote > Save
Modify presentation layer of custom workflow
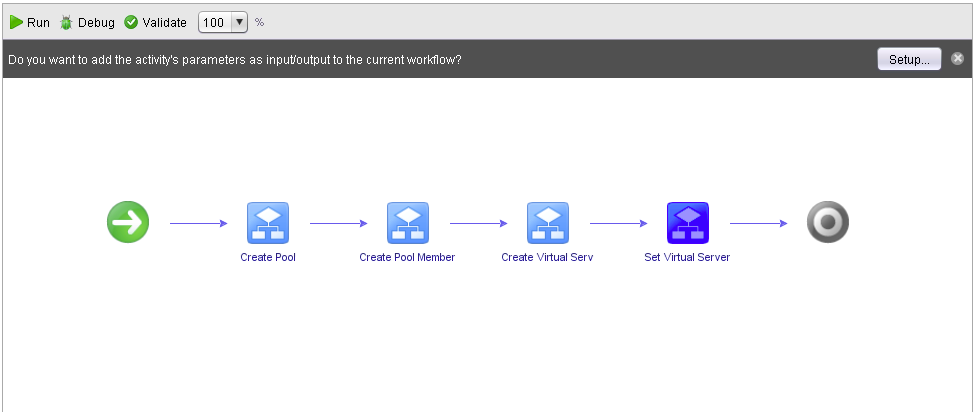
Choose the Green Run triangle to start your workflow
You see the 3 parameters that we set to input appear as input parameters.
Choose Cancel
Choose the General tab You see the loadBalancingmode and partition set to the values we defined define. (view the full screen)
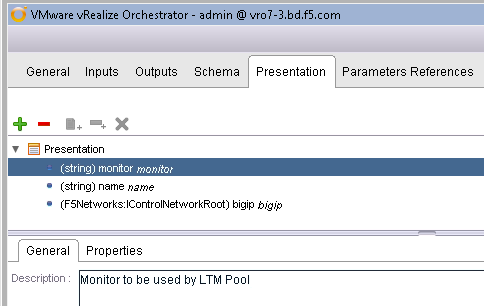
- Choose the Presentation tab(Each variable is shown with 3 parameters (type, name, description):
- Choose monitor and enter Monitor to be used by LTM Pool in the description.
- Choose name and enter Name for LTM objects created by this WF for the description.
- Choose bigip and enter BigIP to be configured in the description field.
Reorder the variables so they appear in this order: bigip, name, and monitor(You can rearrange the variable order by dragging and dropping the variable names.)
Choose the Schema tab
Mouse over the Create Pool workflow on the Schema tab
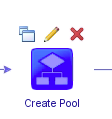
Choose the Pencil icon above the Create Pool workflow
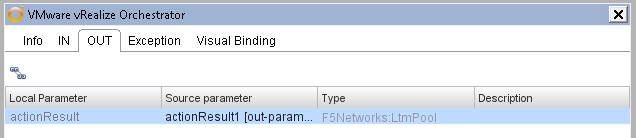
Choose the OUT tab
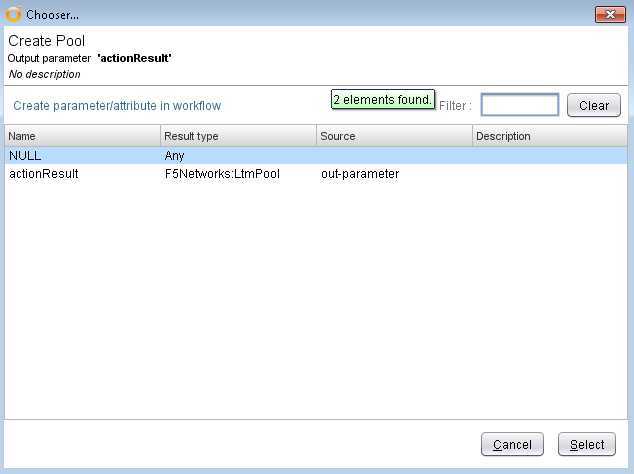
Double Click the actionResult [out-parameter] under Source parameter
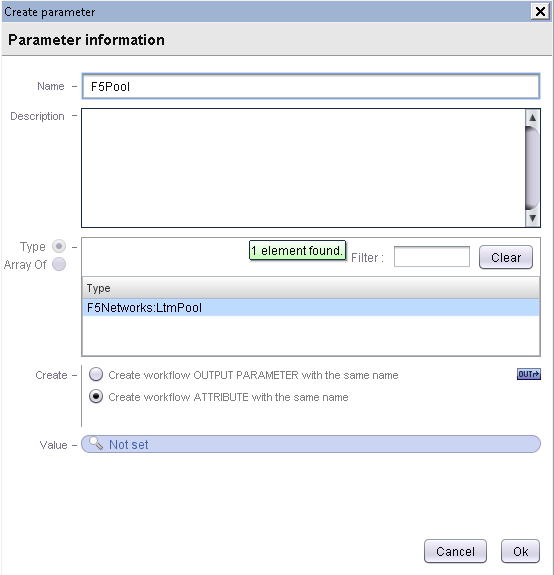
Choose the Create parameter/attribute in workflow link Enter F5Pool in the Name field (This will create an F5Pool output variable that references the pool that has just been created)
Choose Ok > Close > Save
- Choose the Green Run triangle
The order and description of the input parameters has been updated.
Choose Cancel
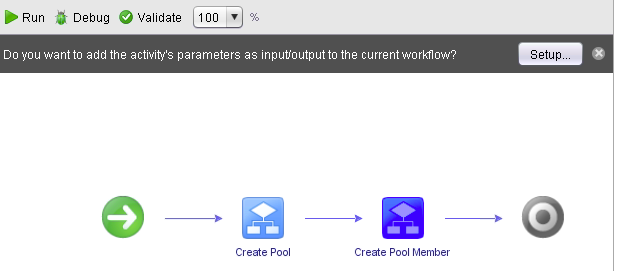
Add the created Pool Member workflow to the custom workflow
Expand the All Workflows heading on the left and navigate to F5/Ltm/Pool
Drag and drop the Create Pool Member workflow to the right of the Create Pool workflow
- Choose Setup in the upper right
Choose Skip in the Reset all binding to: section
Chose Input for address and **port**(This will add the address and port fields to the presentation layer)
Enter lamp11 as the value for node (..This is the pool member object you created as part of the Create Pool Member workflow earlier..)
Choose Promote
Mouse over the Create Pool Member workflow
- Choose the Pencil icon to edit
Choose the IN tab
Double click the NULL Source parameter next to the bigip Local Parameter
Choose the bigip in-parameter
Choose Select
- Repeat steps for the following parameters:
- pool:F5Pool
- partition:partition
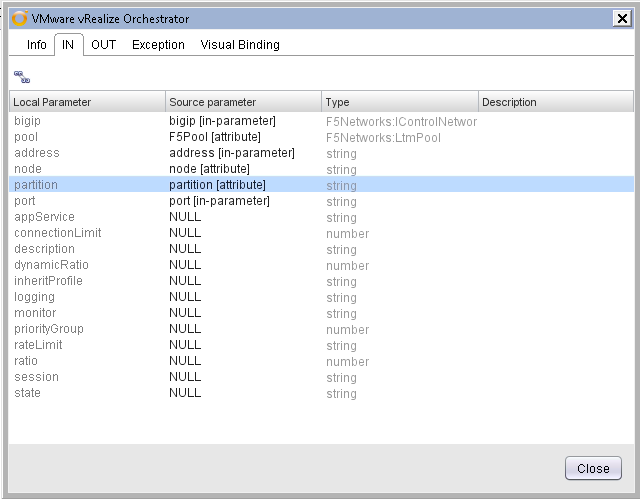
Choose Close > Save
Add the Create Virtual Server workflow to the custom workflow
** Be sure you are in the Schema tab **
Expand the All Workflows heading on the left and navigate to F5/Ltm/Virtual Server
Drag and drop the Create Vitual Server workflow to the right of Create Pool Member on the Schema tab

Choose Setup in the upper right
Choose Skip in the Reset all binding to: section
Set destination to Input(This will add the destination variable to the presentation layer of the workflow)

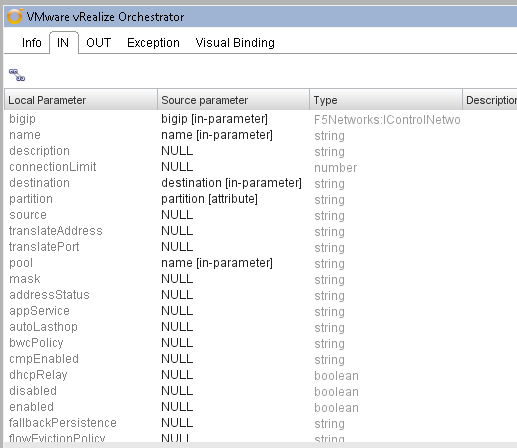
Mouse over the Create Virtual Server workflow
Choose the Pencil to edit
Verify that you are on the IN tab
- Double click the NULL Source parameter next to the bigip Local Parameter
- Choose the bigip in-parameter
- Choose Select
- Repeat steps 9-11 for the following parameters:
- name:name
- partition:partition
- pool:name
Scroll down until you see ipProtocol
Click NULL next to ipProtocol
Choose the Create parameter/attribute in workflow link

Verify ipProtocol in the Name field
Enter tcp as the Value
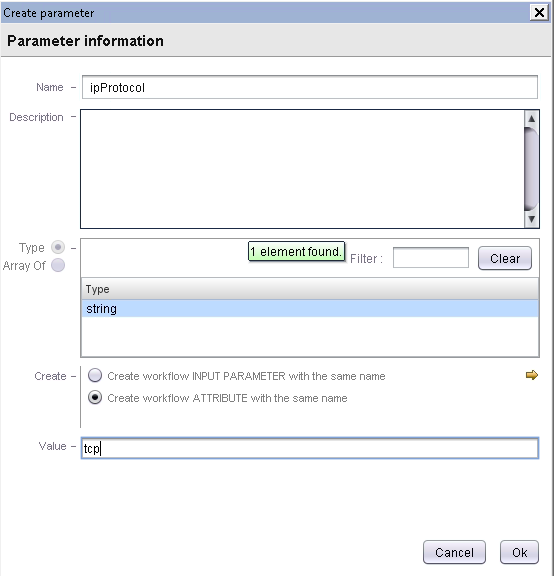
Choose Ok
Choose the OUT tab
Click the virtual Source Parameter Choose the Create parameter/attribute in workflow link
Enter F5Vip in the Name field (This will create an output variable called F5Vip that references the new F5 virtual)
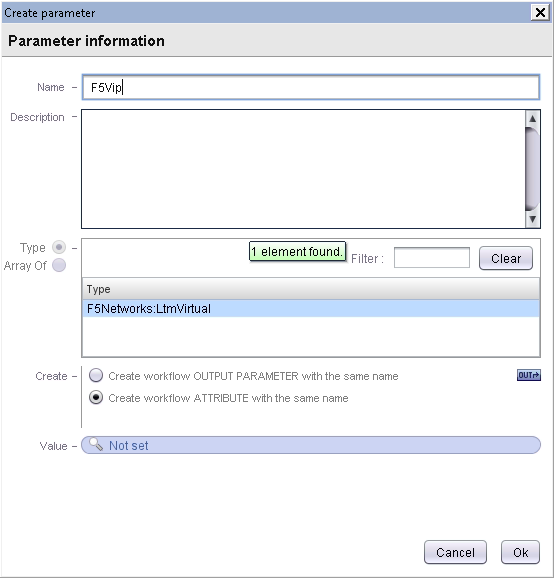
Choose Ok > Close > Save
Choose Validate (This will throw an error showing the the parameter virtual is never used. We will change this in step 20 when we changed the name to F5Vip)
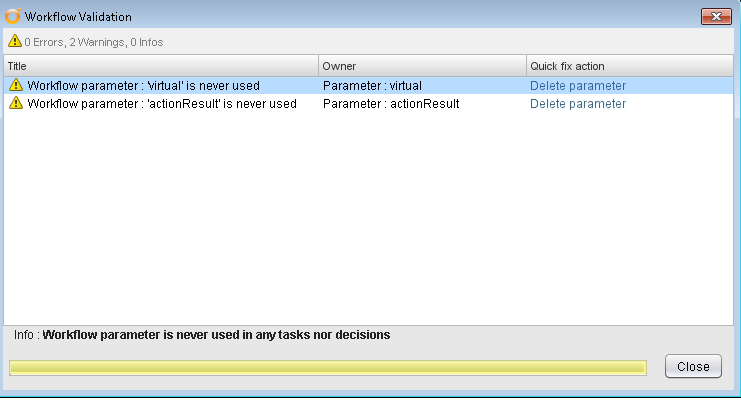
- Choose Delete parameter under the Quick fix action for both results (we replaced virtual with F5Vip)
- Choose Close > Save
Add the Set Virtual Server SNAT to the custom workflow
Expand the All Workflows heading on the left and navigate to F5/Ltm/Virtual Server
Drag and drop the Set Virtual Server SNAT workflow to the right of Create Virtual Server on the Schema tab
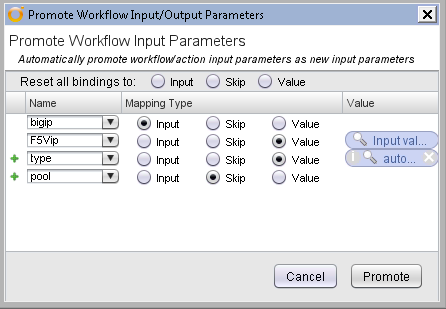
Choose Setup in the upper right
- Verify that bigip is set to input
- Choose F5Vip in the virtual drop down and check Value
- Set type to Value and enter automap
- Set pool to Skip
Mouse over the Set Virtual Server SNAT workflow and choose the Pencil to edit
On the IN tab, click the bigip parameter:
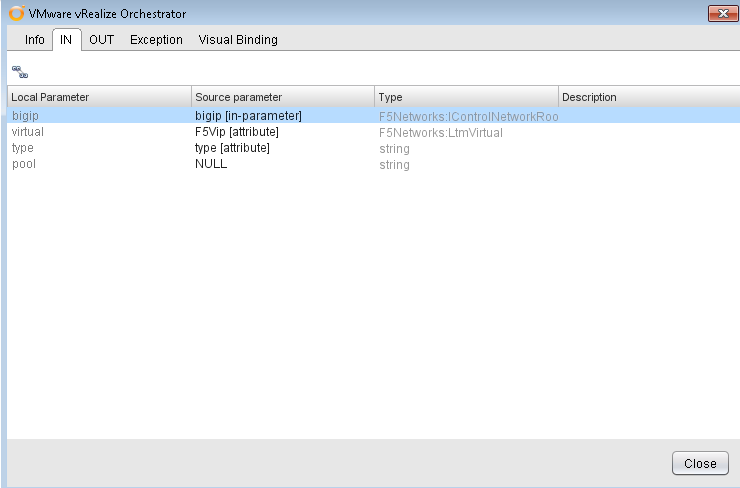
Double click the NULL Source parameter next to the bigip Local Parameter
Choose the bigip in-parameter, then Select
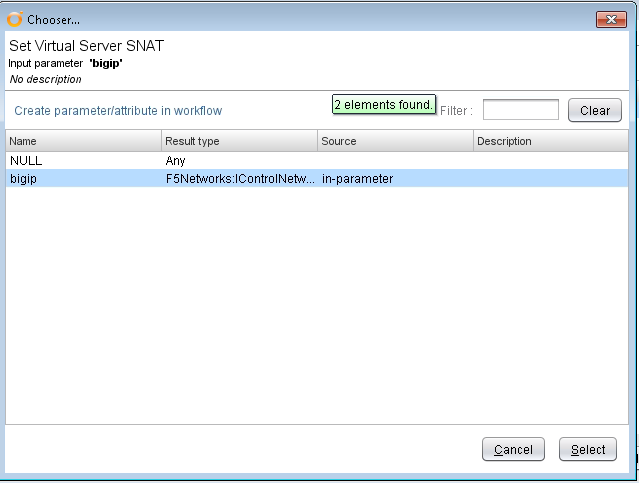
Select Close > Save
On the Presentation tab Set the following descriptions for the variables:
- Address: IP Address for the pool member
- Port: IP Port for the pool member
- Destination: VIP IP address and port < ipaddress:port >
Choose Save and Close
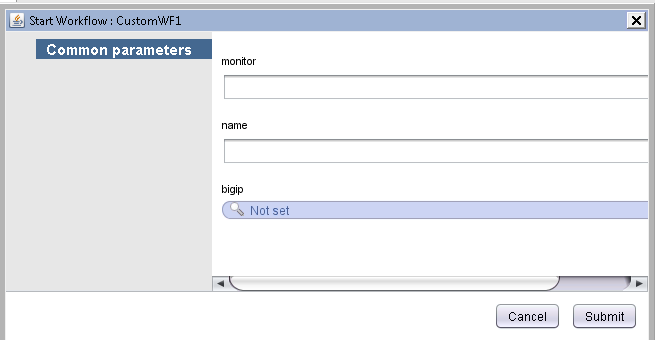
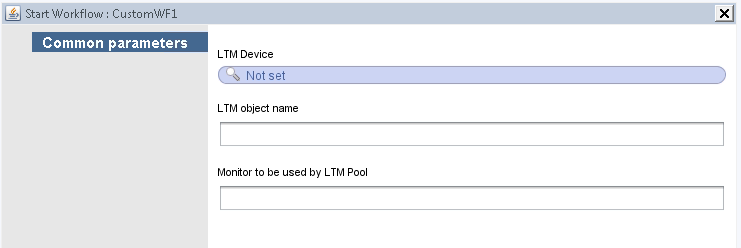
Run the CustomWF1workflow
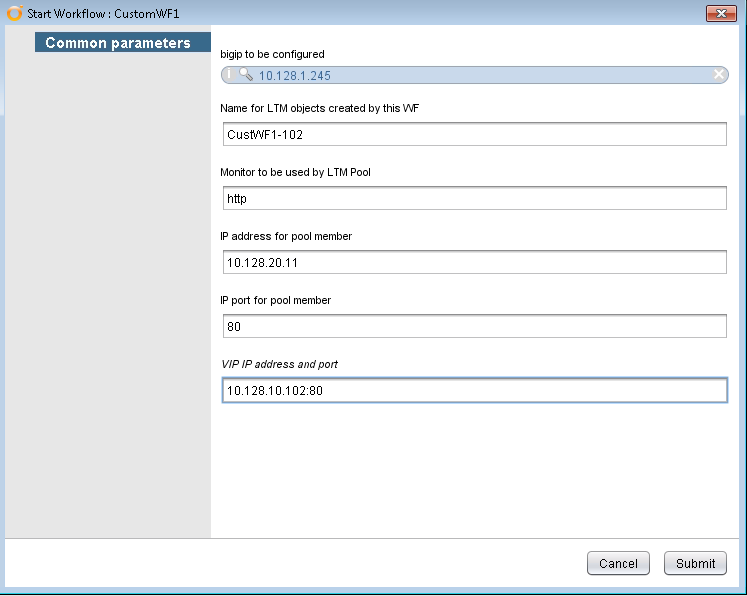
- Right Click on the CustomWorkflows>**CustomWF1** workflow
- Start Workflow.
- Click the Not set link in the BIG-IP field. This will open the Inventory Browser dialog.
- Select the F5 Networks > 10.128.1.245 inventory object.
- Click Select.
- Enter CustWF1-102 in the LTM object name field.
- Enter http in the Monitor to be used by LTM Pool field
- Enter 10.128.20.11 in the Address for the pool member field
- Enter 80 for the Port for the pool member field
- Enter 10.128.10.102:80 for the Destination ipaddress:port field
- Click Submit.
- Verify your new virtual and pool on your BIG-IP GUI
- https://10.128.1.245
- Username: admin
- Password: admin
- Browse through the LTM components (Virtual Server, Pool, etc)
Verify your new virtual from the Client GUI
- Select Administer From Pulldown
- Note: A significant amount of data is pulled into the client. This is a scheduled activity at 5 minute intervals. Changes may not appear immediately.
- Expand the LTM items (Pool, Virtual, Virtual Address)